No-Fuss Chocolate Bark Treats
Highlighted under: Sweet Treat Recipes
I absolutely love making No-Fuss Chocolate Bark Treats because they are quick, easy, and incredibly satisfying. In just a matter of minutes, I can create a delightful sweet treat that’s perfect for sharing with friends or enjoying myself. Whether I'm dressing it up with nuts and dried fruit or keeping it simple with just chocolate, every batch feels like a personal masterpiece. Plus, it’s a fun way for the kids to join in on the kitchen fun, allowing us to bond over chocolatey creativity.
I've experimented with countless variations of chocolate bark, but my favorite has to be this simple version. It all started when I wanted a sweet fix while hosting a casual get-together. I decided to whip up something quick, and this recipe has been a hit ever since. It turns out the secret lies in melting the chocolate slowly to avoid burning it—this ensures a perfectly smooth texture that's easy to work with.
What I love most is the flexibility of this treat! Depending on what I have on hand, I can mix and match toppings like almonds, sea salt, or even crushed cookies. This makes it not only a delicious snack but also an exciting creative outlet in the kitchen. Each batch comes out uniquely different, and that's part of the joy!
Why You'll Love These Treats
- Quick and easy to make with minimal effort
- Versatile; customize with your favorite toppings
- Minimal cleanup with just a few ingredients involved
Key Techniques for Perfect Bark
To achieve a glossy and smooth chocolate bark, it's essential to melt the chocolate at the right temperature. Using the microwave in 30-second intervals prevents overheating, which can lead to a grainy texture. If you encounter this issue, adding a teaspoon of vegetable oil or shortening can help restore a smooth consistency. Stirring between intervals ensures even melting, so don’t rush this step for the best results.
When combining your nuts and dried fruit with the melted chocolate, a gentle folding motion is best. This technique helps ensure that each piece is coated without clumping, which enhances the final appearance and texture. Consider using different nuts or fruits depending on your personal preference. For instance, try using dried pineapple for a tropical twist or hazelnuts for a rich flavor enhancement.
A spatula is an indispensable tool for spreading the chocolate mixture evenly on the parchment-lined baking sheet. Thinner layers will set more quickly and make for a more delightful crunch. Aim for a thickness of about 1/4 inch; this way, your bark will break beautifully into pieces once hardened. For those who prefer thicker bark, allow for a longer chilling time to ensure it sets properly.
Ingredient Insights
The key ingredient in this recipe is, of course, the chocolate. Semi-sweet chocolate chips give the bark a rich flavor, but you can modify it by using milk chocolate for a sweeter treat or dark chocolate for a more intense taste. If you're dairy-free, look for vegan chocolate chips to make the recipe suitable for your dietary needs.
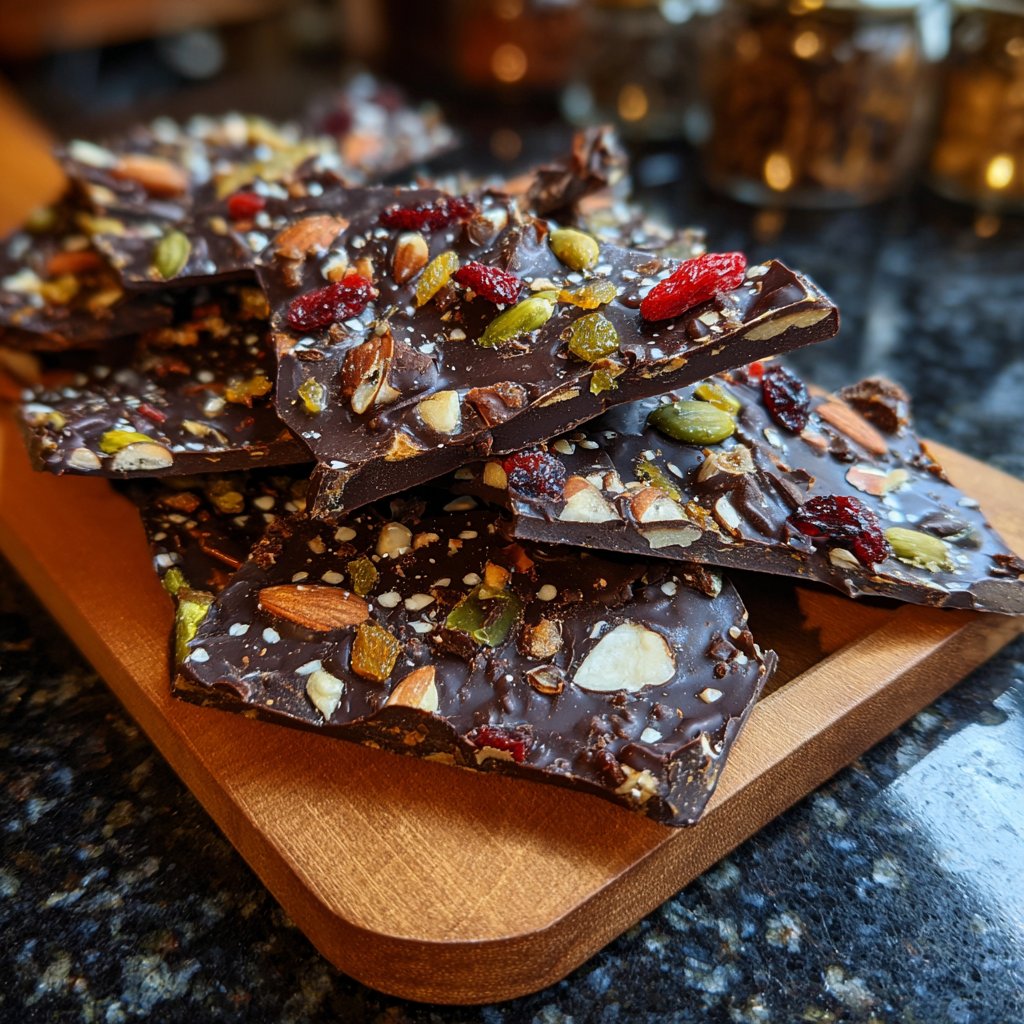
The mixed nuts not only provide a delightful crunch but also contribute essential nutrients and healthy fats. If you’re looking for a nut-free option, consider using seeds like pumpkin or sunflower seeds. These alternatives will provide a similar texture while ensuring that those with nut allergies can enjoy your chocolate bark without worry.
Dried fruit adds a contrast of sweetness and chewiness, complementing the rich chocolate perfectly. If you want to change things up, consider using coconut flakes or crushed pretzels for added texture and flavor. Each of these substitutions can create a unique variation of chocolate bark, making it a wonderfully versatile recipe.
Storage and Serving Ideas
Once your chocolate bark has set and is broken into pieces, store it in an airtight container at room temperature for up to two weeks. This makes it an excellent make-ahead option for parties or holiday gifts. If you desire an even longer shelf life, consider refrigerating the bark; just be mindful that it may lose some of its texture and crunch over time.
For serving, consider pairing your chocolate bark with a bowl of fresh fruit or a selection of cheeses to balance its sweetness. Cutting the bark into smaller pieces creates an inviting array on a dessert platter, ideal for gatherings or movie nights. I love to sprinkle a bit of sea salt over the top for a gourmet touch just before serving.
If you’re feeling adventurous, you can create themed bark for different occasions by adding seasonal toppings. For Halloween, use orange and black candies; for Christmas, try crushed peppermint or festive sprinkles. The options are limitless, and it allows your creativity to shine each time you make it.
Ingredients
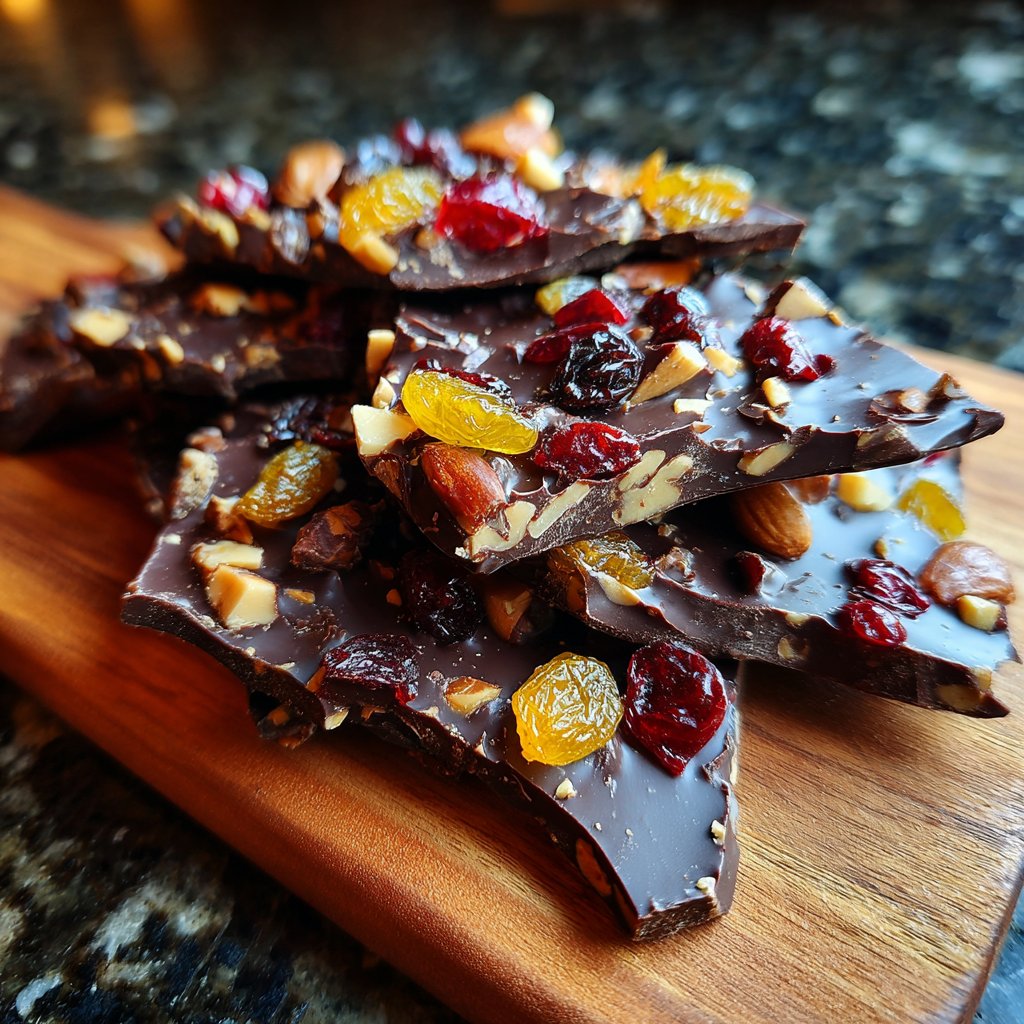
Ingredients for No-Fuss Chocolate Bark Treats
For the Chocolate Bark
- 2 cups of semi-sweet chocolate chips
- 1 cup of mixed nuts (almonds, walnuts, etc.)
- 1/2 cup of dried fruit (raisins, cranberries, etc.)
- 1/4 teaspoon of sea salt (optional)
Feel free to explore different variations with these ingredients!
Instructions
Steps to Make No-Fuss Chocolate Bark Treats
Melt the Chocolate
In a microwave-safe bowl, combine the chocolate chips. Heat in the microwave in 30-second intervals, stirring in between, until smooth and fully melted. Be careful not to overheat.
Combine the Ingredients
Once the chocolate is melted, stir in the mixed nuts and dried fruit until evenly coated.
Spread the Mixture
Line a baking sheet with parchment paper and pour the chocolate mixture onto it, spreading it out evenly with a spatula. Sprinkle with sea salt if desired.
Chill to Set
Place the baking sheet in the refrigerator for about 1 hour or until the chocolate is fully set.
Break and Enjoy
Once set, break the chocolate bark into pieces and serve. Enjoy your delicious treats!
Store in an airtight container in the fridge for optimal freshness.
Pro Tips
- Experiment with different types of chocolate such as dark or white chocolate for varied flavors. You can also add spices like cinnamon for an extra kick!
Tips for a Successful Batch
If you don’t have a microwave, you can melt the chocolate using a double boiler. Simply fill a pot with a few inches of water and bring it to a gentle simmer, then place a heatproof bowl on top with the chocolate chips inside. Stir continuously until completely melted, ensuring that no water splashes into the chocolate. This method may take a few extra minutes, but it gives you great control over the melting process.
When handling hot melted chocolate, be cautious to avoid burns. Allow the bowl to cool slightly before you begin mixing in your nuts and fruits. Using a rubber spatula will help manage the heat while allowing you to easily scrape down the sides of the bowl, ensuring no melted chocolate goes to waste.
If you're short on time, the bark can be set in the freezer instead of the refrigerator. This process typically takes about 20-30 minutes, but watch it closely to prevent it from becoming too hard. Once set, remember to let it sit at room temperature for a few minutes before serving for optimal texture.
Personalizing Your Bark
The beauty of No-Fuss Chocolate Bark Treats lies in their versatility! Feel free to experiment with flavor profiles by infusing the melted chocolate with spices such as cinnamon or chili powder for a unique kick. A splash of flavored extract, such as orange or almond, can add an aromatic quality that elevates your treat.
Consider creating a layered effect by making two batches: one with milk chocolate and another with dark chocolate. Pour the first layer onto the parchment paper, let it set slightly, and then pour the second layer on top. This not only enhances the visual appeal but also allows for different flavor experiences in each bite.
If you're encouraging kids to get involved, let them choose their own toppings! Setting out a variety of ingredients will keep them engaged and encourage creativity. This collaborative aspect makes the treat-making process enjoyable and memorable, resulting in a chocolate bark that reflects each person's taste.
Questions About Recipes
→ Can I use different types of chocolate?
Absolutely! You can use dark, milk, or even white chocolate, depending on your taste preferences.
→ How should I store the chocolate bark?
Keep it in an airtight container in the refrigerator for up to two weeks.
→ Can I add ingredients like sprinkles or cookies?
Yes! Customize your bark with any toppings you like, just remember to ensure they adhere to the melted chocolate.
→ Is this recipe gluten-free?
Yes, as long as you use gluten-free chocolate chips and toppings, this recipe is gluten-free!
No-Fuss Chocolate Bark Treats
Created by: The Carolynscookbook Team
Recipe Type: Sweet Treat Recipes
Skill Level: Easy
Final Quantity: 8 servings
What You'll Need
For the Chocolate Bark
- 2 cups of semi-sweet chocolate chips
- 1 cup of mixed nuts (almonds, walnuts, etc.)
- 1/2 cup of dried fruit (raisins, cranberries, etc.)
- 1/4 teaspoon of sea salt (optional)
How-To Steps
In a microwave-safe bowl, combine the chocolate chips. Heat in the microwave in 30-second intervals, stirring in between, until smooth and fully melted. Be careful not to overheat.
Once the chocolate is melted, stir in the mixed nuts and dried fruit until evenly coated.
Line a baking sheet with parchment paper and pour the chocolate mixture onto it, spreading it out evenly with a spatula. Sprinkle with sea salt if desired.
Place the baking sheet in the refrigerator for about 1 hour or until the chocolate is fully set.
Once set, break the chocolate bark into pieces and serve. Enjoy your delicious treats!
Extra Tips
- Experiment with different types of chocolate such as dark or white chocolate for varied flavors. You can also add spices like cinnamon for an extra kick!
Nutritional Breakdown (Per Serving)
- Calories: 200 kcal
- Total Fat: 14g
- Saturated Fat: 5g
- Cholesterol: 0mg
- Sodium: 50mg
- Total Carbohydrates: 22g
- Dietary Fiber: 2g
- Sugars: 15g
- Protein: 3g